
We have been asked a few times about how we produce our route maps. Many people seem to struggle with the limit of the number of layers imposed by Google Maps. Here’s a step-by-step guide to how we convert our tracks from Garmin Tracks (or most other GPS tracks) into a multi layered Google Map.
1. Download the Garmin tracks from the GPS into BaseCamp (Garmin free software).
2. To join multiple Garmin tracks, simply highlight all those to be joined, then ‘right click’ on each one and select ‘Join selected tracks’. There is now a new single track which is the combination of all the selected Garmin tracks.

3. Double click on the required track and it will open the track information box on the screen.
4. Choose the colour for the track (top right).
5. Select ‘Filter’ (see bottom row of buttons).
6. Filter ‘Entire Track’. Set ‘Maximum Points’ to 500 for a country level map and 2500 for a continent/global level map. This process greatly reduces the file size. Then press ‘ok’.
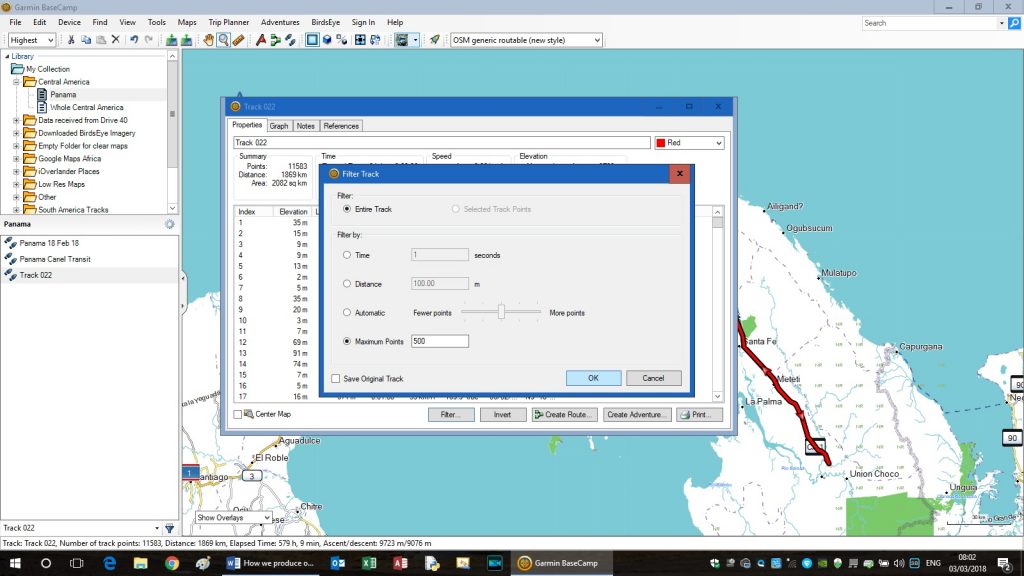
7. Close the track information box.
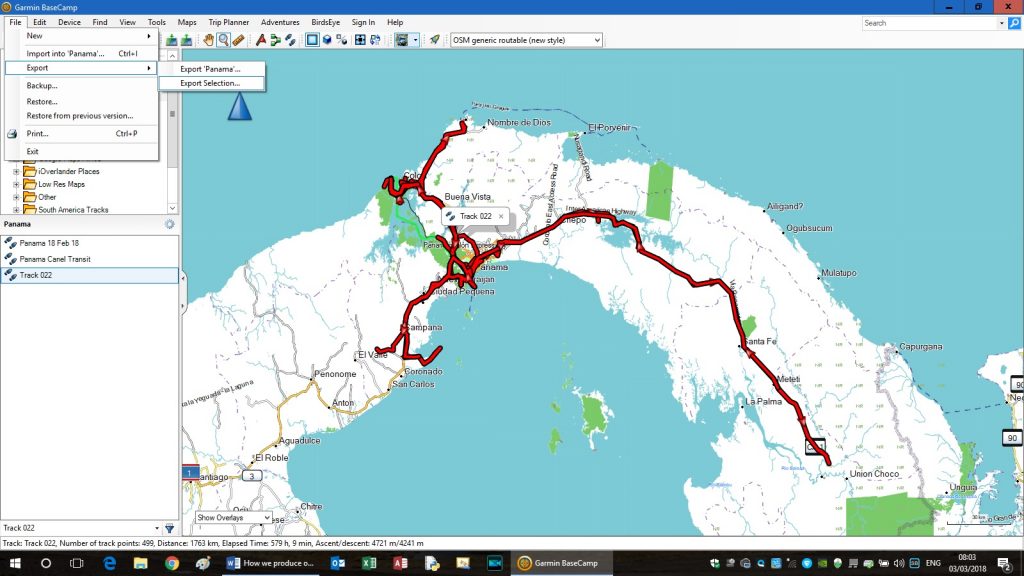
8. Highlight the same track again, then select ‘File’ (top left corner), then ‘Export’ from the drop-down menu, then ‘Export Selection’.
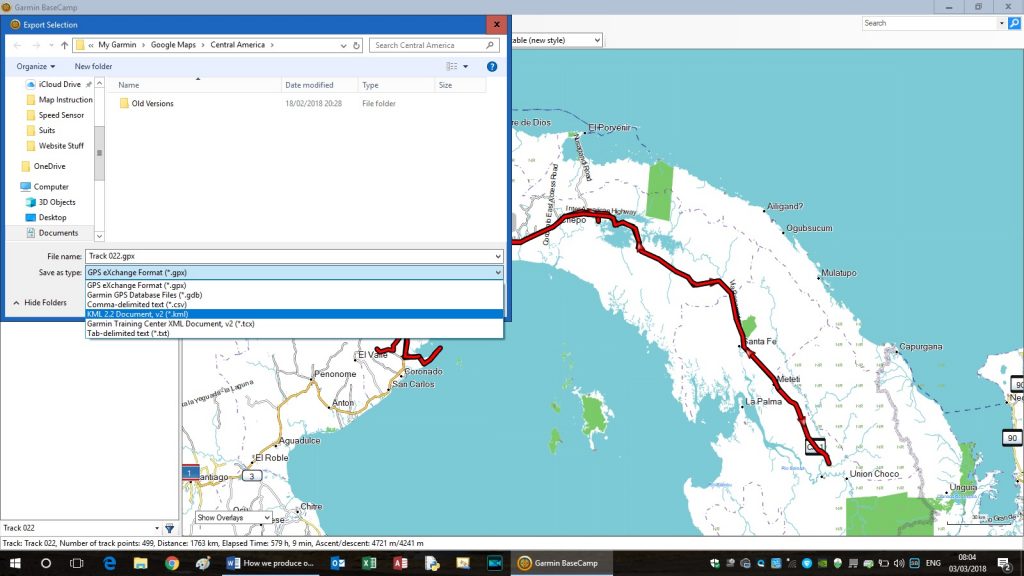
9. Now a file save window will open. Change the ‘Save as type:’ to ‘KML 2.2 Document, v2 (*.kml)’ and then save under the name and location you would like.
10. Close Basecamp and open Google Earth – off-line mode is fine.
11. In Google Earth select ‘File’ then ‘Open’ from the drop-down menu and a file selection window will open. Select the file you saved in step 9 and open.
12. The file will open on the globe and be in the bottom left of the Google Earth screen, under ‘Temporary Places’ folder.
13. To the left of the file, click on the ‘>’ to open the sub folder.
14. The ‘Tracks’ folder will now appear, click on ‘>’ to open this folder.
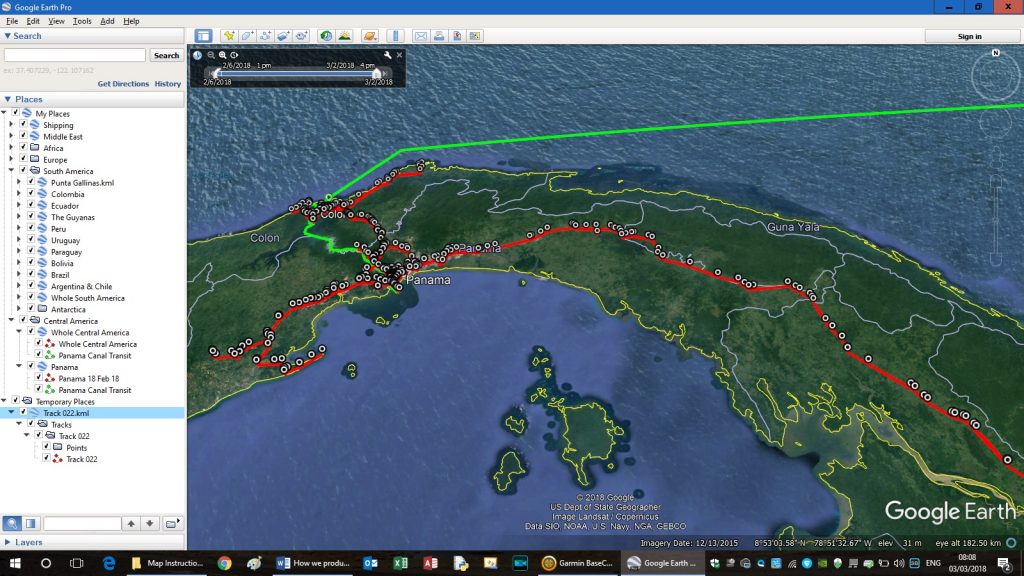
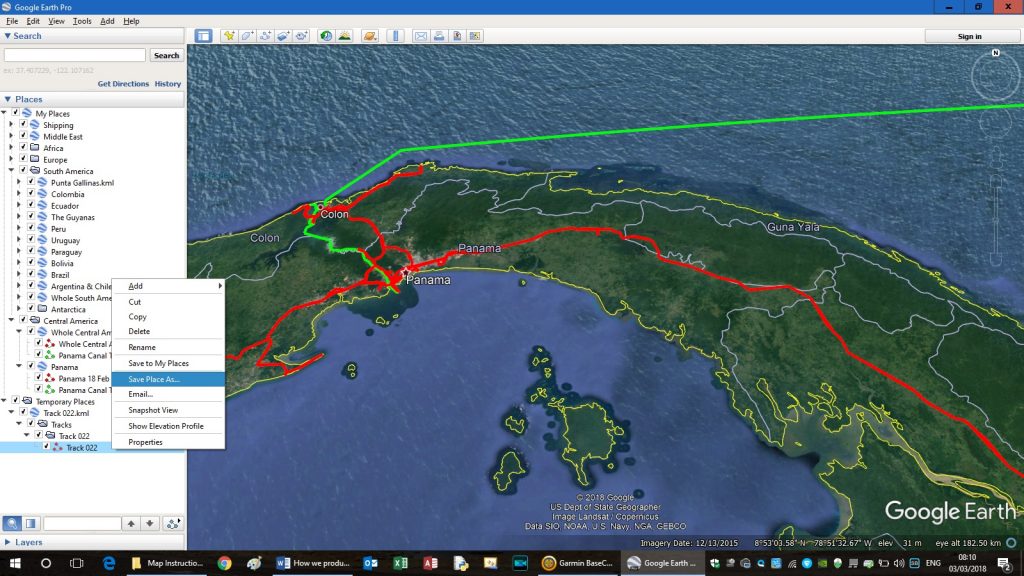
15. Another folder will now appear with your file name, click on its ‘>’ to open it. It will contain two items:
– a folder called ‘Points’ which contains all the points. This is quite a large file; it is not required and can be deleted; and
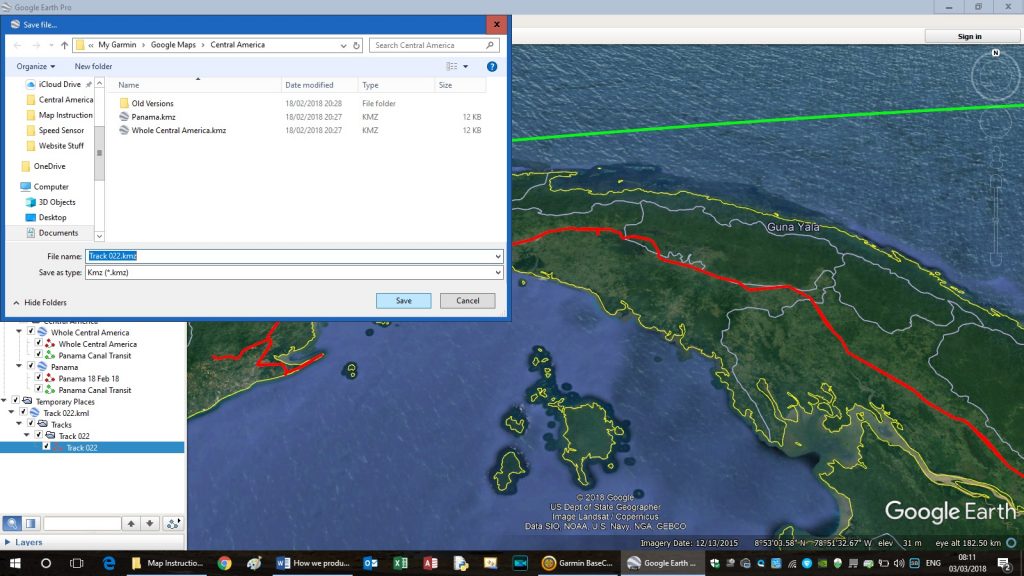
– a small symbol (showing 3 waypoints joined by a track) representing the actual track lines of the route to be saved on the map. Right click on this and select ‘Save Place As…’. A Save File window opens. Save the file as a ‘Kmz (*.kmz)’ file type.
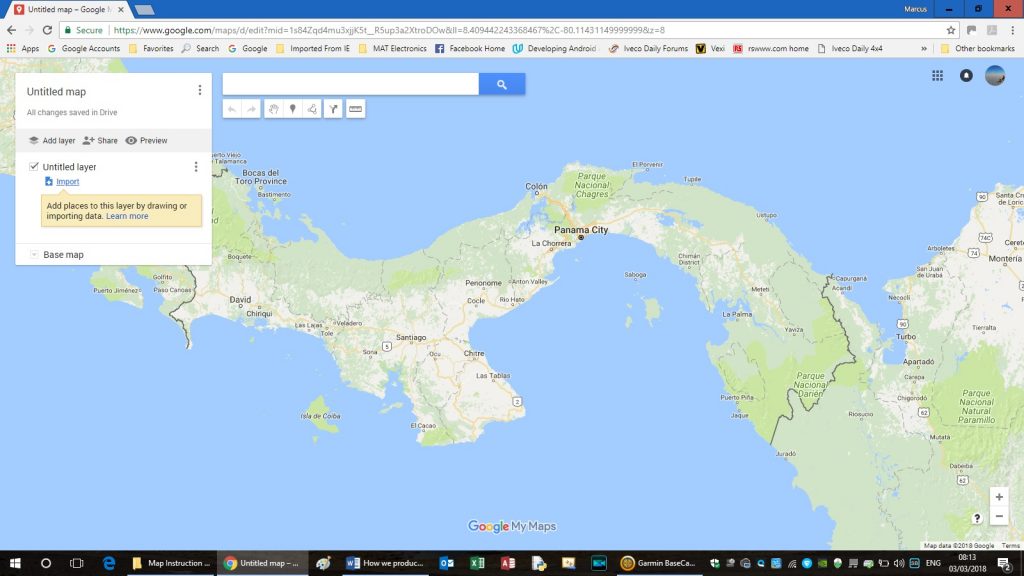
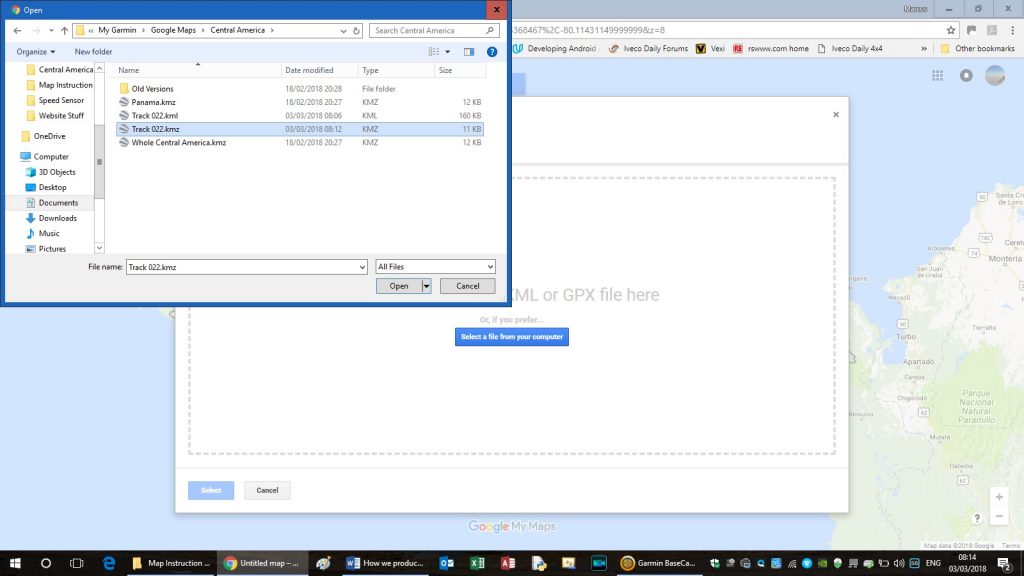
16. Go to ‘My Google Maps’ and click on ‘+ CREATE A NEW MAP’. In the next page when it opens, there will be an ‘import’ option under ‘Untitled Layer’, click on this and import the file you saved in step 15.
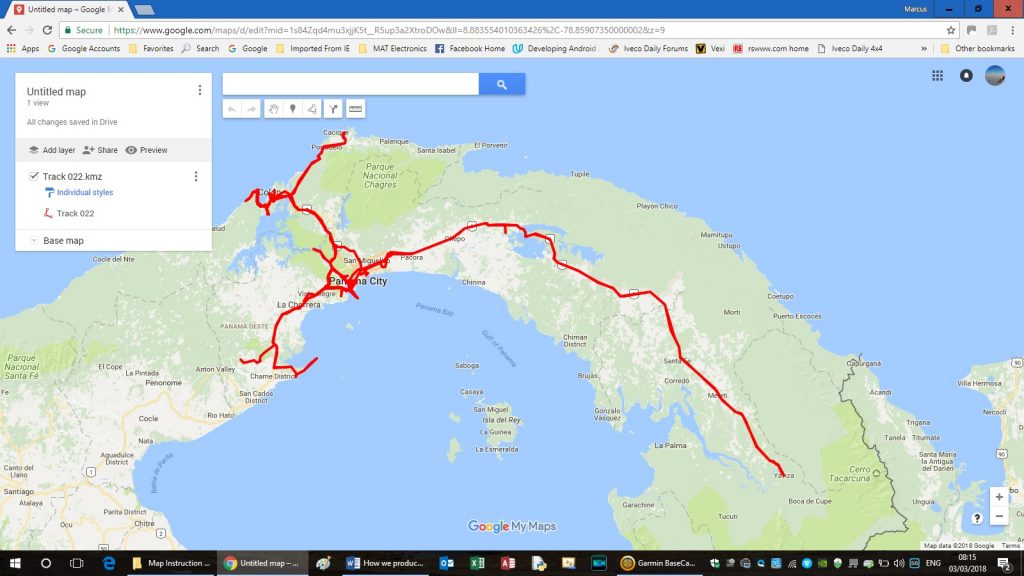
17. You now have a nice map created from your Garmin Tracks 😊