If you read any overlanding or 4×4 forum you soon come across a discussion on off-road tyres and wheels (wheels probably to a lesser extent, but they’re still important). What are the best ones for what conditions? Which last the longest? Which get the least punctures? Should you use inner-tubes? How to fix a puncture? etc.
We have chosen Michelin 255/100 R 16 XZY tyres, mounted without inner tubes on air-tight split rims, and this is also what Iveco thought was best for Cuthbert too! Here’s why we made our choice….
Load and speed rating
The first consideration is the load you are going to put on the tyre. Our rear axle has a limit of 3,700 kg, so we need a load rating of 129 or greater. All tyres should have a ‘load/speed rating’ marked on them, but the tyres that we have chosen have two ratings: 126K and 134J. The 126K allows an axle load of 3,400 kg at a maximum speed of 110 kph and the 134J allows an axle load of 4,240 kg at a maximum speed of 100 kph (you can look-up the various codes and ratings in the table on the Michelin website). To comply with the Law in most countries, a vehicle should be fitted with tyres with a load/speed rating above the vehicle’s maximum designed speed and axle weights. Our truck has a 100 kph speed limiter and we can therefore use the 134J tyre limits.
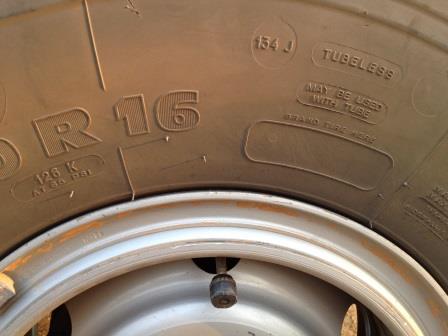
Here you can see the two tyre ratings 126K & 134J and the tyre pressure monitoring system sensor fitted to the valve stem.
Tread pattern
One of the reasons that we bought an Iveco Daily 4×4 truck, is its off-road performance, which we knew we would be putting to good use in Africa. It would therefore have been pointless to fit ‘road’ tyres. The Michelin XZL tread pattern is used by the military and by construction companies around the world because of its ability in the off-road environment. The XZL can be run at very low pressures and has additional features such as a steel mat under the tread for protection from nails, and steel side-plies for extra sidewall protection!
Tubed or Tubeless?
Tubeless tyres are now the preferred option for almost all new cars; they are safer and quicker to install! If punctured, a tubeless tyre deflates more slowly than a tubed tyre and is therefore more controllable for the driver. Tubeless tyres also tend to be less prone to punctures in the first place (this is often contested by tube users, but my point is that you can get a puncture in a tubed wheel because the tube has rubbed against the wheel; this is obviously not a risk with a tubeless tyre!).
Tubeless tyres can, more often than not, be fixed very quickly using plugs. A tubed tyre however, must be disassembled, the inner tube fixed and then re-assembled again; a much slower process. I have often repaired a tubeless tyre on a vehicle before it has even gone completely flat (driving around a large construction site, with a range of nails and screws through the tyres, has given me plenty of practice!).
Having stated the case for the tubeless tyre, there are a few advantages to tubes. With tubes you can run much lower pressures for sand driving. And if the tyre has a lot of damage, you can use a tube to make it airtight/usable (off road only) to get out of trouble.
We have therefore chosen what I consider to be the best of both worlds: wheels with split rims. These allow the wheel to be taken apart to allow the tyre to be fitted. The clever bit with these split-rims supplied by Iveco is that, unlike many split rims, they have a seal. So even though the wheel splits, it can still be used with or without an inner-tube.
The Michelin XZL tyres are also rated for use with or without tubes. We therefore normally use the tyres without tubes, but carry a couple of inner tubes for ‘emergency use’ in the bush (i.e. if we get a puncture that we can’t fix to get to civilisation). Another advantage of the split rim wheel design, is that it makes the task of removing the tyre for any repair much easier (see the section on installing tyre beads for more information on this).
How many spares?
The normal advice for overland travel in Africa is to carry two spare wheels. This is because there can be large distances between towns and the conditions can be very hard on off-road tyres and wheels. In the remote areas of Namibia for example, it would not be an exaggeration to say that the number of tyre repair shops in each small town out-numbers the food stores by about 2:1. This is for a good reason!
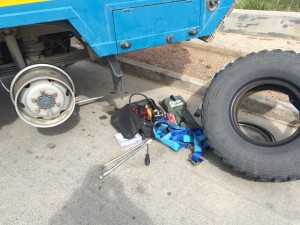
Our XZL tyres each weigh 40 kg, without the wheel! This is a lot of weight, so we have decided to take one spare wheel and a second spare tyre. We also have a very comprehensive tyre repair kit consisting of tyre pliers, patches, plugs, mushroom plugs and glues, along with the various tools required for preparing the tyre for repair.
We obviously won’t be able to source any replacement tyres easily in Africa if we damage more than two spare tyres. So as a ‘last resort’, if it all goes horribly wrong, our emergency contingence is to use Landrover/Land Cruiser tyres on the front axle! The front axle has a load within the ‘car 4×4’ limits and as we have 16” wheels, these tyres will fit. They are also very widely available. If we had to do this, the difference in tyre diameter between the front and rear axle could over-work the centre differential. We would therefore probably need to convert the vehicle to rear wheel drive by removing the front prop-shaft and engage the centre diff lock.
Fat or thin?
In my view, thin tyres are far better than fat tyres for overlanding. Fat tyres might look ‘cool’ and work well for a weekend off-roading in a 4×4 car with a high power-to-weight ratio. They generate a fairly large footprint and therefore have quite good flotation on soft surfaces, even without deflating. Their disadvantage however, is their large frontal area to be pushed through the soft surface. This requires more power to move the vehicle, which in turn uses more fuel. A heavy overlanding vehicle may not even have the power in a high range gear and could possibly require low range to move! The extra power required will significantly reduce the fuel range, which could be problematic for overlanding in remote areas or when there are long distances between fuel stations.
By contrast, a skinny tyre generally has a much higher profile than a fat tyre and so can be deflated to produce the same footprint size as a fat tyre when necessary. Importantly, the footprint of a deflated tyre becomes significantly longer, but not significantly wider. So although the skinny tyre when deflated can have the same footprint area as a fat tyre, its narrower frontal profile does not require so much power to move through the soft surface. It is therefore less likely to require low range and the fuel consumption will be far lower than with fat tyres.
In soft mud (snow) there are two scenarios: first, bottomless soft mud (snow) where the aim is to try and float on top to maximise traction. In this case, deflating to achieve the maximum footprint with minimal frontal area is best. Secondly, a layer of soft mud (snow) on top of firmer ground. In this scenario, the aim is for the tyre to cut through the softer mud (snow) to gain traction on the firmer ground below. This isn’t possible with the wide footprint of a fat tyre. However, a skinny tyre at normal pressure or possibly higher, will cut through the softer mud (snow) with ease to gain traction on the firmer ground beneath.
So, fat tyres on a light 4×4 car, travelling a limited area can be fine (think beach buggy). But for global overlanding travel with a heavy vehicle and a limited power-to-weight ratio, encountering all types of terrain and conditions, the more flexible skinny tyre is definitely your friend.
Tyre pressures
Luckily for us in this respect, Iveco and Michelin have done all the hard work for us. They have produced a table of the optimum tyre pressures to be set for the axle weights of the Daily 4×4, with XZL tyres, driven on various surfaces.
Cuthbert’s weight changes considerably as he is used: the fuel and water tanks alone can result in a weight variation of over 400kgs. We have therefore worked out two sets of figures to allow for when we are light and heavy:-

Why do we lower the pressure off road?
Off road, the conditions can be very rough and a lower pressure will make the tyre softer, so that it can absorb some of the bumps. It also allows the tyre tread to bend over objects, providing more grip. In soft sand, lowering the tyre pressure does not increase the tyres width by very much, but it does greatly increase the length of the tyre in contact with the sand. This helps to prevent the vehicle from sinking into the sand, without increasing the drag (in fact it actually reduces the drag as the tyre sits on top of the sand more). In very soft mud however, it is often better to set road pressures, or possibly even higher, so that the tyre can cut through the softer mud to the firmer sub-soil, or hopefully rock, below.
Tyre pressure monitoring
If you don’t stop your vehicle until you have felt the effect of the puncture, it is quite likely that you will have damaged the tyre before you noticed the puncture. Even worse, you may have lost control of the vehicle!
This is why tyre pressure monitoring systems have become popular, and are becoming a legal requirement on new vehicles in some countries. Modern vehicles often use the ABS sensors to measure the speed of each of the wheels. It calculates that if one wheel is running faster than the others, it must have a smaller rolling diameter, therefore must be deflating , and a puncture warning is signalled.
The other option is to install a small pressure-measuring device in each wheel which transmits the pressure by radio to a warning system in the cab. This kind of system is now available ‘off the shelf’ to fit to any vehicle. Originally I purchased TyrePal TA22X and tried it out on my Toyota Fortuner. It worked OK and would be great for a normal car. However with this system, it was a real pain to change the settings when deflating the tyres for off-road driving. It also seemed to struggle with the large pressure changes throughout the day as the tyres heated up. For example: the rear axle tyres on Cuthbert when cold are set at 73 psi. However they raise to over 85 psi when driving in the heat of midday. This led to countless false alarms and eventually the removal of the distraction: TyrePal TA22X binned!
During our travels through Namibia we met a German couple in a Unimog, using a far better system. Better still, it was available in Namibia – ‘The Tire Moni Checkair TM-100’! In the next largish town, only a 1,000 km away, we managed to find one of these systems. It is now installed on Cuthbert and we can highly recommend it. It has several advantages over our old system.
- All 4 tyre pressures are continuously displayed.
- You set the alarm limits that you want for min, max pressure and max temperature.
- The limits are set for each axle, so you can have different limits for front and back axles.
- It is quick and easy to change the limits when you ‘air up’ or ‘air down’.
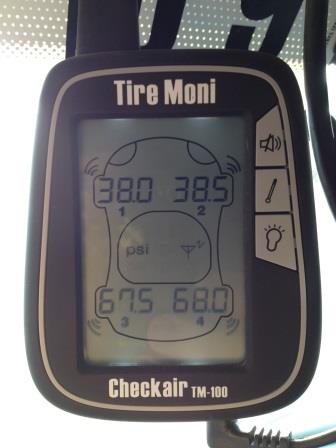
The Tire Moni tyre pressure monitor
So how are the tyres doing so far?
As I write this, we have completed around 30,000 km on these tyres: around 18,000 km in Europe (mostly on tar) and 12,000 km in Africa, with more than 8,000 km off-road.We are about half-way through the tread depth and have a number of deep cuts in some of the tyres, but no punctures or repairs needed so far.
I am in no doubt whatsoever that many of these deep cuts would have gone through a normal tyre. We have been driving over some exceptionally rocky areas: in Damaraland, Namibia for 2 days we couldn’t reach speeds above 20 kph due to the rocks! We have also travelled on sand, mud and very corrugated gravel tracks for thousands of kilometres. In conclusion we are very pleased with these tyres and wheels and can highly recommend them.
Update after 47,000km
In March 2015 after almost 47,000km on the first set of tyres, Cuthbert suffered his first blow-out! See the story and video at Cuthbert’s First Blow-out
Update – Jan 2016
I have been asked a few times about how hard it is to change the tyres on these split-rim wheels. I have therefore made a short video showing me changing a tyre.
It is also possible to remove the tyre with the wheel still fitted on the truck!
Tyre Re-Grooving
One advantage of the Michelin XZL tyres is that they can be regrooved. This extends the life of the tyres by somewhere between 5,000-10,000 km. Before I attempted to re-groove our tyres, I did a bit of research on the subject. There are several YouTube videos showing the technique and I also found some useful documentation on-line.
The specification sheet for the 255/100R16 XZL tyres can be downloaded here: http://www.viermalvier.de/ubbthreads.php/ubb/showflat/Number/662159/Searchpage/1/Main/46944/Words/%2Bmichelin+%2B255100R16/Search/true/re-michelin-255-100-r16.html#Post662159
Michelin has published a re-grooving catalogue explaining the benefits of the procedure:
http://www.pso-fr.com/wp-content/uploads/2015/09/Michelin-Regrooving-Catalog.pdf
Following my research I calculated that if I re-grooved 4 tyres, the extended life of the tyres would more than cover the cost of the tool. So I bought a RILLFIT-R6 Tyre regroover with a pack of R4 blades from the Tyre Equipment Company in UK, see:
http://www.tyre-equipment.co.uk/acatalog/RILLFIT-R6-Tyre-regroover-93_210.html
I bought the 230V AC version of the re-groover as that is the output voltage of our truck’s inverter (it only uses about 500W, so no issues with power). There are 110V AC versions of the regroover too.
In the specification document for the tyres mentioned above, it shows the recommended re-grooving pattern, with a maximum re-grooving depth of 3 mm, using an R4 blade set to a width of 10 to 12 mm.
This is not intended to be a ‘how to’ guide to regrooving, I am no expert, this is simply what I found worked for me.
As the tyres have slightly uneven wear of the tread, I measured the remaining tread depth across the tyre in several places around the tyre. I added the 3 mm maximum cut depth to the minimum tread depth remaining, and set the cutting blade to this depth. Note the guidance says that tyres should be regrooved until they are down to about 3 to 4 mm of tread remaining.
At first, I tried setting the temperature to No.3 as recommended on the R4 blade packet. However, I found that the blade became too hot and failed very quickly; after cutting only a few cross-treads the blade became deformed. I suspect that this may be due to: a) the soft compound that the XZL tyres are made from compared to a normal road tyres, and b) my technique. Once I started to use the No.2 temperature setting, I had much better results and could re-grove an entire tyre or more with just one blade.
Pitures below show the re-grooving tools and a part worn tyre cmpared to a re-grooved one.
-
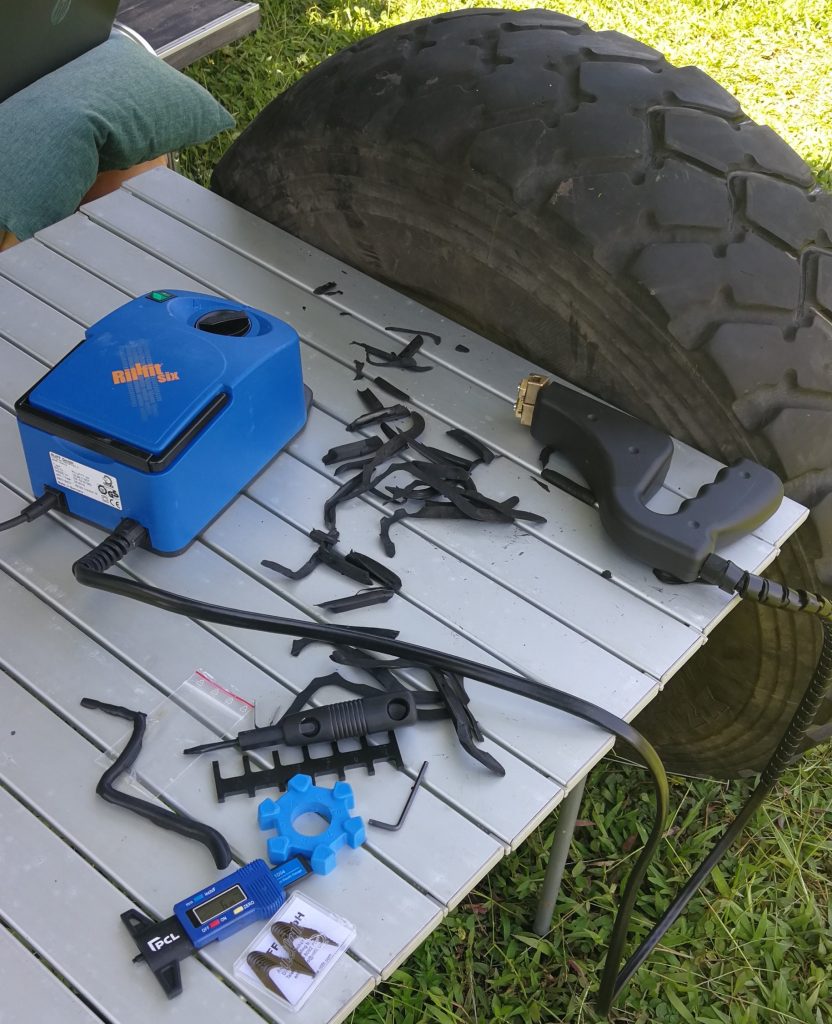
- Tyre re-grooving tools
-
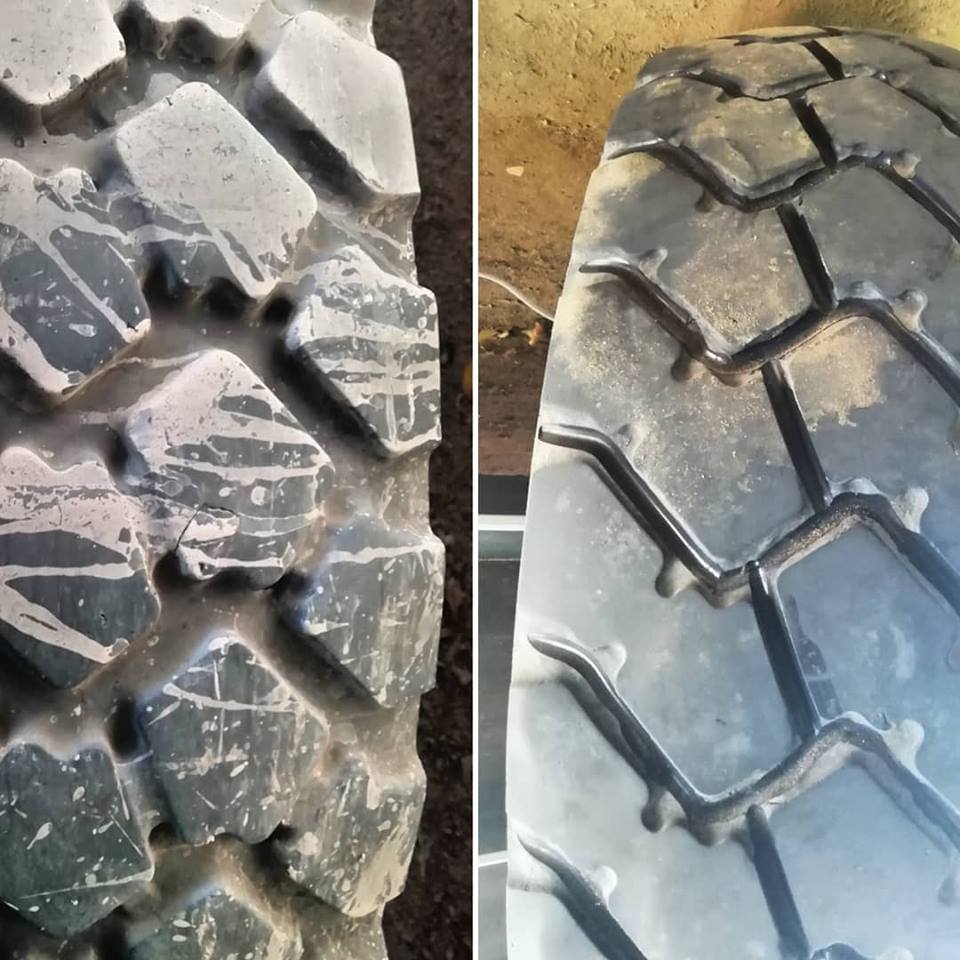
- Part warn tyre on the left and re-grooved tyre on the right
Update Mar 19
We’ve been asked lots of questions about the Michelin XZL 255/100R16 tyres we run on our Iveco Daily 4×4 and the pressures we use. This video helps to explain why we like the tyres and how we use them.
Update Jul 19
Here is a video showing how I regroove my tyres.